

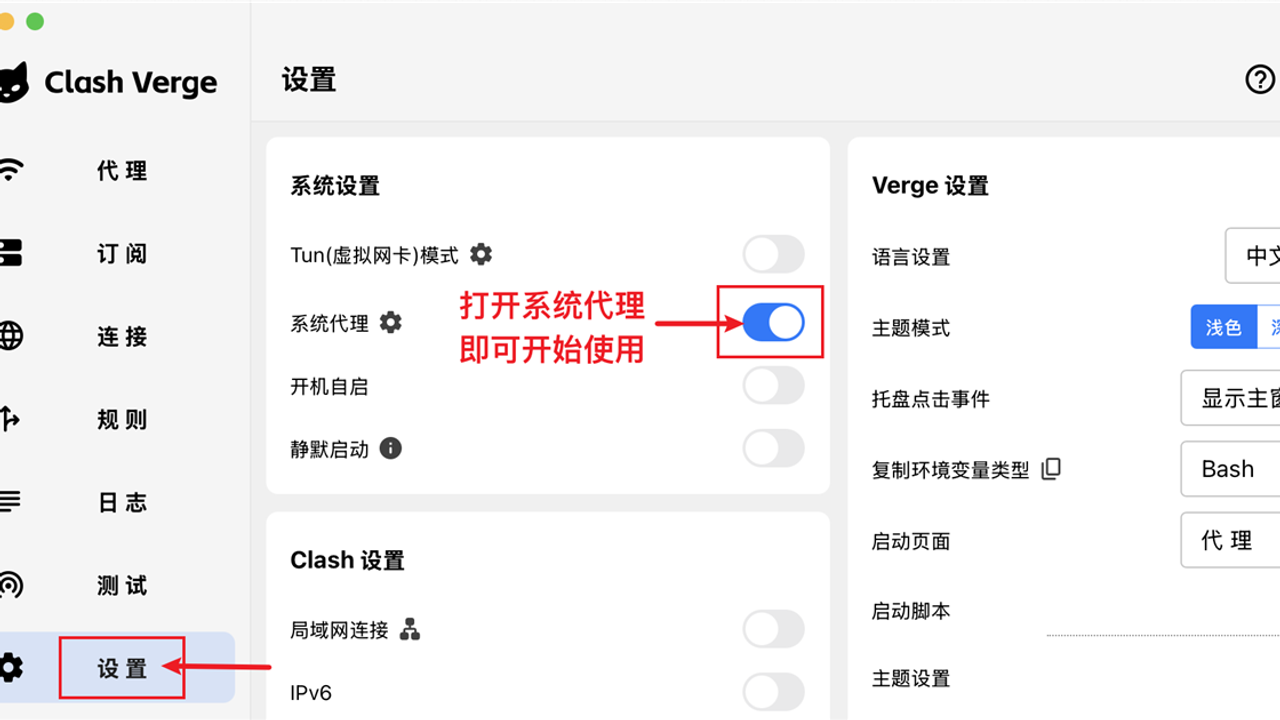
Clash Verge Rev is a cross-platform desktop interface for the Mihomo proxy core. This practical guide follows the normal first-run path: install a stable build, import a profile, choose a routing mode and node, then enable either the system proxy or TUN according to the applications you need to cover.
Install the right build and import a profile
Download a stable build from the project's official GitHub Releases page. Match the package to your operating system and CPU architecture; most Windows PCs use x64, while newer ARM devices need ARM64. The official project supplies Windows, macOS, and Linux packages, and Windows 7 is no longer supported.
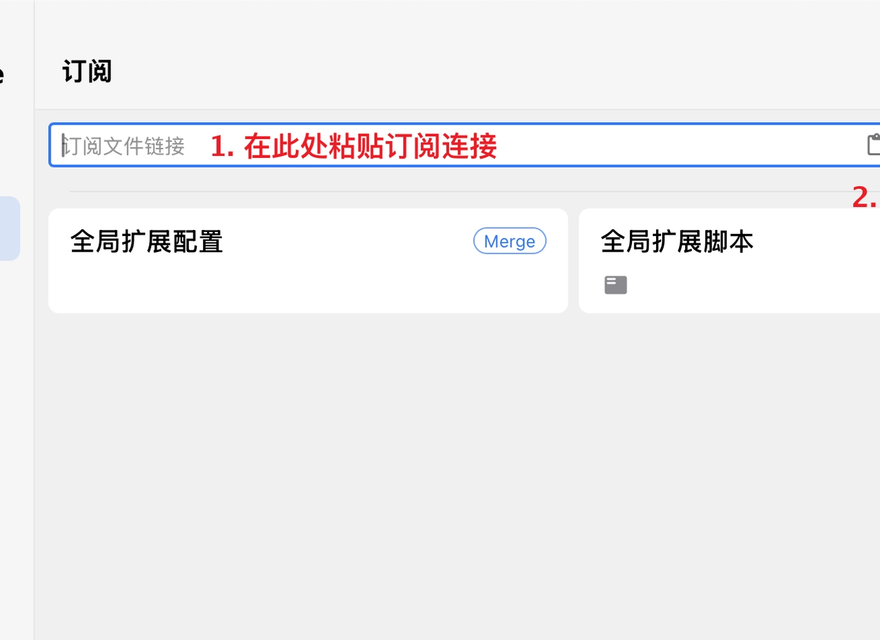
Open Profiles, paste the subscription URL supplied by your authorized provider, and import it. You can also import a compatible local configuration. Refresh the profile and make it active. If a remote import reports a connection error, try another supported import method from the official documentation.
Choose a routing mode and node
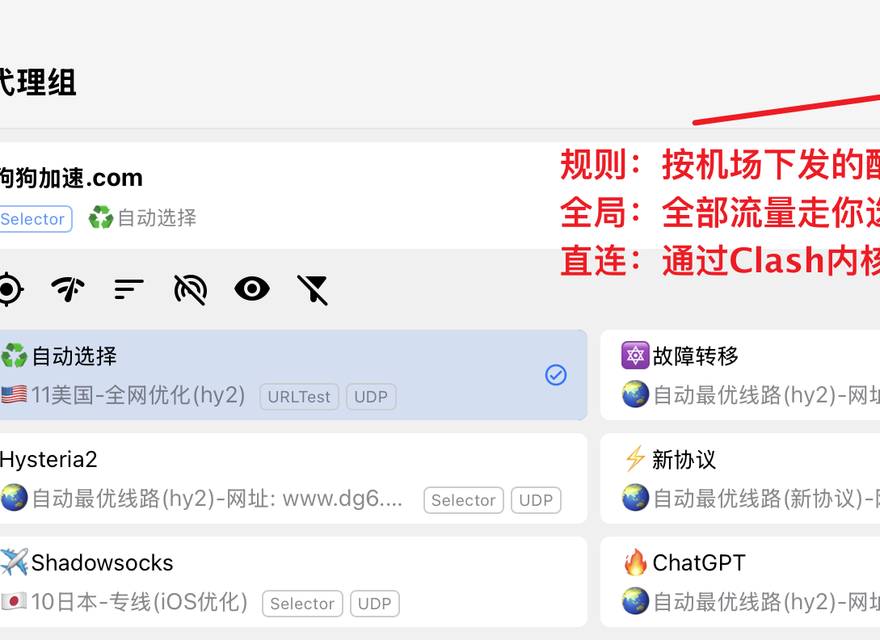
Open Proxies and start with Rule mode for everyday use: each request follows the active rule set. Global sends eligible traffic through one selected proxy, while Direct bypasses proxy routing.
Inside the relevant proxy group, select a node and run the built-in delay test as a quick availability signal. The smallest number is not always the most stable route, so verify the applications you actually use.
Turn on System Proxy or TUN
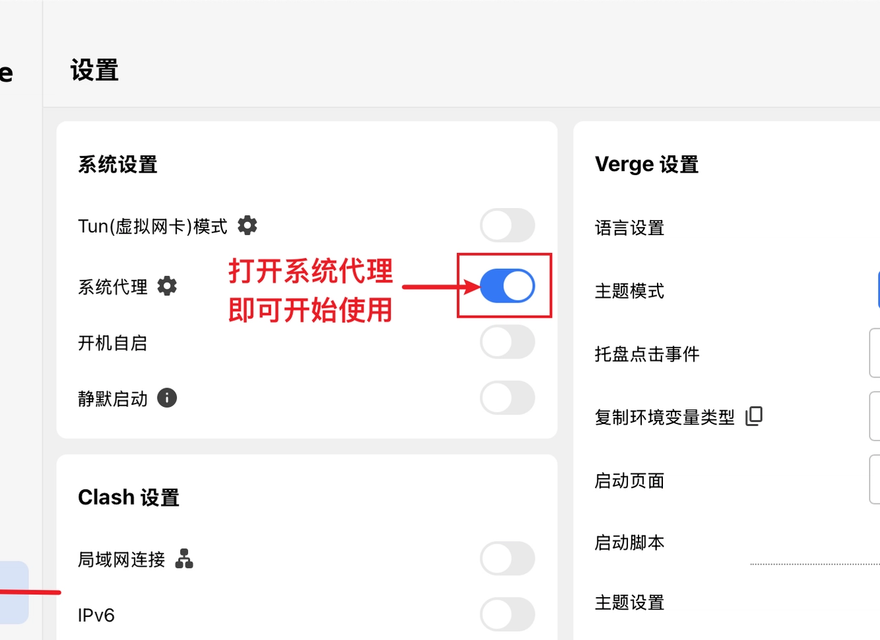
For browsers and most applications that respect operating-system proxy settings, enable System Proxy first. The official quick-start guide describes this as the normal choice for most browser traffic.
Use TUN Mode when an application ignores the system proxy—for example, some games and command-line tools. TUN uses a virtual network adapter and therefore covers more traffic, but it can require service installation or administrator authorization. After enabling it, confirm that local-network access, DNS resolution, and the applications you care about still behave as expected.
Verify the connection and fix common problems
- Confirm that the intended profile is active and has refreshed successfully.
- Confirm the current mode, proxy group, and selected node before changing advanced settings.
- Open Connections or Logs to see whether requests match a proxy rule, go direct, or fail.
- If connectivity breaks after a change, turn off TUN and System Proxy, restore a known-good profile, and test again one change at a time.
- Before quitting or uninstalling, disable the active capture mode so stale operating-system proxy settings do not leave applications offline.
The official platform FAQs document core communication, TUN, service-permission, WebView, DNS, and Linux display issues. Use the platform-specific FAQ when the basic checks above do not isolate the problem.
Continue with the official guide
Open the official quick-start page for the latest interface-specific instructions, then use GitHub Releases to download updates from the project source.
Sources
- Clash Verge Rev quick-start guide — official project documentation, accessed 5 August 2026.
- Clash Verge Rev GitHub repository and feature overview — official project repository, accessed 5 August 2026.
- Clash Verge Rev releases — official release packages and release notes, accessed 5 August 2026.
- Clash Verge Rev platform FAQs — official troubleshooting documentation, accessed 5 August 2026.